Symptom
Symptom | What It Means |
|---|---|
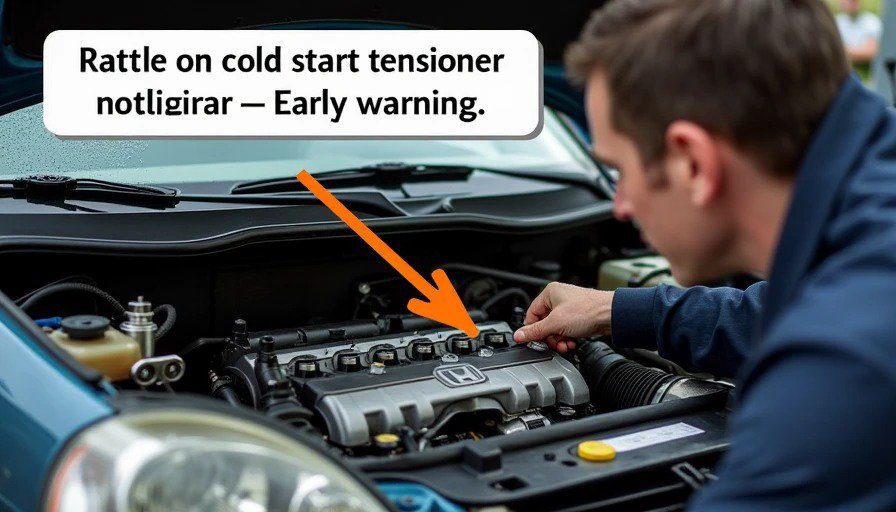
Rattle on cold start (1–2 seconds) | Timing chain tensioner bleeding down — early warning |
Check engine light with P0341, P0365, P0344 | Cam/crank correlation codes — chain may have jumped |
Rough idle, loss of power, misfire under load | Chain stretched or guides worn — timing retarded |
Metallic clatter at all RPMs | Chain slapping guides — imminent failure risk |
⚠️ Stop driving immediately if you hear metallic clatter. A broken K-series timing chain is an interference engine event — pistons meet valves, and you're looking at a cylinder head rebuild or worse.
Diagnosis — Confirm Before You Tear Into It
Don't assume it's the chain. Do these checks first:
Step 1: Listen. Cold start rattle only? Likely tensioner. If it rattles all the time, chain or guides are worn.
Step 2: Pull codes. If you have cam/crank correlation codes (P0341, P0365, P0344), the chain has likely stretched or jumped.
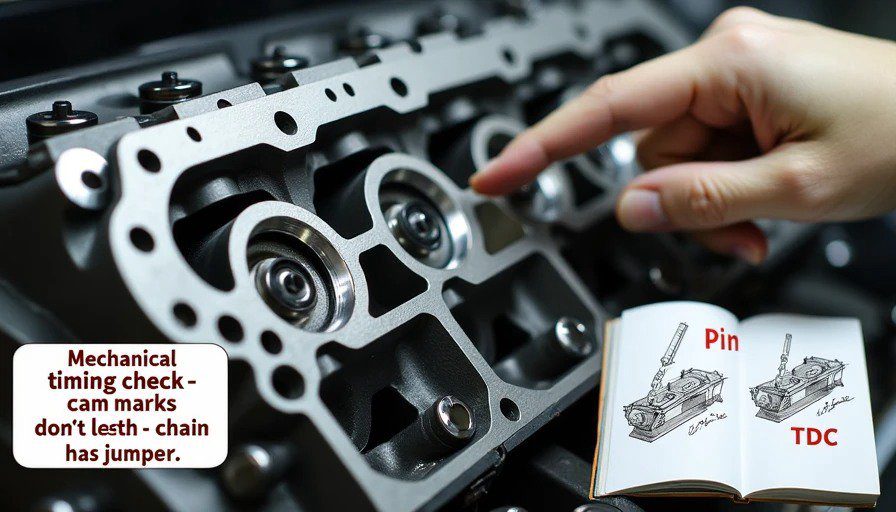
Step 3: Mechanical timing check. Rotate crank to TDC and check camshaft alignment marks. If the marks don't line up, your chain has jumped.
Step 4: Tensioner inspection. Remove the tensioner (14mm, passenger side of the timing cover). If it's fully extended beyond spec, it's shot. If it's collapsed and the chain is still loose, guides are worn.
Step 5: Oil pressure check. Low oil pressure can cause tensioner failure. Check oil pressure before you replace parts — otherwise you'll do the job twice.
Tools Required
Specialty Tools (Must Have)
Tool | Part Number (Example) | Purpose |
|---|---|---|
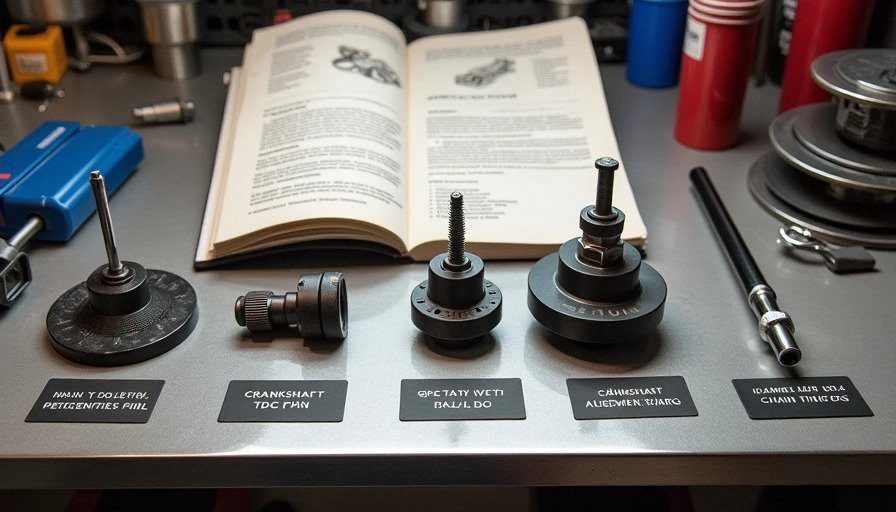
Crankshaft pulley holding tool | 07AAB-001A100 or OEM equivalent | Hold crank pulley for removal |
Crankshaft TDC pin | 07AAF-PR70300 | Lock crank at TDC |
Camshaft holder / alignment plate | 07AAB-001A110 or aftermarket | Lock cams at TDC |
Timing chain tensioner stopper / lock pin | Included with most timing kits | Compress tensioner during install |
Pro tip: You can make a crank holding tool from flat bar — but the OEM pin and cam plate are cheap and worth buying. Don't guess with timing.
General Tools
Tool | Size |
|---|---|
Socket set | 8mm, 10mm, 12mm, 14mm, 17mm, 19mm |
Torque wrench (ft-lb) | 1/2" drive |
Torque wrench (in-lb) | 3/8" drive (critical for small bolts) |
Impact wrench | For crank pulley bolt (optional but recommended) |
Pry bar | For tensioning the chain (install) |
Pliers | For cotter pins / clips |
Seal puller | For front crank seal |
RTV sealant | Hondabond HT or Permatex Ultra Grey |
Engine degreaser & brake cleaner | For cleaning mating surfaces |
TDC glow plug / dial indicator (optional) | To verify TDC |
Parts Required — Recommended to Replace
Part | OEM Part Number (Example) | Qty | Note |
|---|---|---|---|
Timing chain kit (chain + guides + tensioner) | 14510-PNC-000 / 14520-PNC-000 / 14530-PNC-000 | 1 kit | Includes everything below |
Timing chain | 14401-PNC-004 | 1 | OEM or quality aftermarket (Cloyes, etc.) |
Chain guide (left / tensioner side) | 14620-PNC-000 | 1 | |
Chain guide (right / slack side) | 14610-PNC-000 | 1 | |
Timing chain tensioner | 14510-PNC-000 | 1 | Never reuse the old tensioner |
Crank pulley bolt | 90014-PNA-000 | 1 | Torque-to-yield — MUST replace |
Front crank seal | 91212-PNA-001 | 1 | Replace while cover is off |
Camshaft seals (front) | 91206-PNA-000 ×2 | 2 | Optional but recommended |
Valve cover gasket | 12341-PNC-000 | 1 | New grommets too |
Water pump (optional) | 19200-PNA-000 | 1 | Accessible during this job — do it if over 100k miles |
Coolant | Honda Type 2 (premix) | ~2 gal | You'll drain some to do water pump |
Procedure — Step-by-Step
Preparation
Disconnect battery (negative terminal).
Raise vehicle and support on jack stands.
Drain engine oil and coolant (if doing water pump).
Remove accessory belt, tensioner, and idler pulleys.
Remove crankshaft pulley:
Use crank holding tool to lock pulley.
Remove the center bolt — this bolt is torque-to-yield, discard it.
Use a puller to remove the pulley from the crank.
Access the Timing Cover
Remove the valve cover (10mm bolts, 12 of them). Mark which bolts go where.
Remove the front timing cover — 14 bolts (8mm, 10mm, and two 12mm below). A few are hidden behind the oil pan — you'll need to remove the upper oil pan bolts that secure the cover.
Clean all RTV sealing surfaces thoroughly.
Lock the Engine at TDC
Rotate the crankshaft clockwise (as viewed from the front) until the TDC mark on the crank pulley lines up with the pointer on the oil pump.
Insert the TDC pin into the hole in the block (just behind the alternator) to lock the crank. It should slide in fully.
Check the camshaft alignment marks: the holes in the camshafts (at the rear of the head) should line up with the slots on the cam holder plate — or, looking from the front, the timing marks on the cam sprockets should face each other.
If cams are not aligned, rotate crank one full revolution and re-check — you may be 180° out.
Remove Old Components
Remove the camshaft sprocket bolts (14mm) — they are not torque-to-yield but use threadlocker on reinstall.
Remove the old tensioner (14mm) — if it's under tension, be careful.
Remove the chain guides (10mm bolts).
Remove the timing chain — note the colored links on the chain (if present) for reference, but you'll use the timing marks on the new chain.
Installation — New Chain and Components
Clean all mating surfaces on the block, head, and timing cover. Scrape old RTV completely.
Install the new chain guides:
Slack-side guide (right side of engine) — torque bolts to 9 ft-lb (12 N·m).
Tensioner-side guide (left side) — torque bolts to 9 ft-lb (12 N·m).
Pre-install the new tensioner:
Compress the tensioner plunger using a vise or press.
Insert the locking pin (or a small drill bit) to hold it compressed.
Do not install the tensioner yet — leave it out until the chain is routed.
Install the crankshaft sprocket (if removed) — make sure the key is aligned and the sprocket is seated.
Install the timing chain:
Align the bright colored link on the new chain with the crankshaft sprocket dot at the 6 o'clock position.
Route the chain up the right side (slack side), over the exhaust cam sprocket (align colored link with the dot on the sprocket, typically at 12 o'clock).
Route the chain across the top, then down the left side (tensioner side), and around the intake cam sprocket (align colored link with the dot on that sprocket, typically at 3 o'clock).
The sprockets should now have their timing marks facing each other (exhaust mark at 3 o'clock, intake mark at 9 o'clock — or similar, depending on your engine — verify with your service manual).
Double-check that all colored links align with sprocket dots.
Install the cam sprocket bolts — new threadlocker (blue Loctite 242), torque to 68 ft-lb (92 N·m).
Install the timing chain tensioner:
Insert the compressed tensioner into its bore and tighten to 36 ft-lb (49 N·m).
Remove the locking pin — the tensioner will extend and take up slack.
Rotate the crankshaft two full revolutions (720°) clockwise. Check that all timing marks realign — if they do, timing is correct. If not, the chain jumped a tooth — repeat routing.
Remove the TDC pin from the crank hole.
Reassembly
Install the front crank seal into the timing cover (use a seal installer or a socket of the right size). Coat the seal lip with clean oil.
Apply a bead of RTV (Hondabond) to the timing cover sealing surface — follow the service manual pattern (typically 3mm bead, with loops around corners). Be careful not to get RTV into the oil passages.
Install the timing cover — torque bolts in a crisscross pattern:
Bolt Size | Torque |
|---|---|
8mm bolts | 9 ft-lb (12 N·m) |
10mm bolts | 14 ft-lb (19 N·m) |
12mm bolts | 18 ft-lb (24 N·m) |
Install the crankshaft pulley:
Clean the crank snout and the pulley's inner bore.
Install the pulley onto the crank — tap it on gently with a rubber mallet (or use the bolt to pull it).
Install the NEW crank pulley bolt — do NOT reuse the old one.
Torque in sequence:
First step: 49 ft-lb (67 N·m)
Second step: 90° (1/4 turn) additional
Final step: 90° (1/4 turn) additional — this is a torque-to-yield angle spec.
If you don't have an angle gauge, mark the bolt head with paint and turn 180° total after the initial torque.
Install the valve cover — apply a small dab of RTV at the corners where the timing cover meets the head. Torque valve cover bolts to 7 ft-lb (10 N·m) — do not overtighten.
Reinstall accessory belt, tensioner, and pulleys.
Refill engine oil with fresh 5W-30 (5 quarts). Refill coolant if drained.
Reconnect battery.
First Start & Leak Check
Prime the oil system: Crank the engine with the fuel pump fuse removed for 10–15 seconds to build oil pressure before firing. This prevents dry start on the new tensioner.
Start the engine. Listen for any rattles — it should be smooth and quiet.
Check for oil leaks at the timing cover and valve cover. Let the engine run for 10 minutes, then shut off and recheck.
Re-torque valve cover bolts after one heat cycle (once cooled).
Clear any stored codes with a scanner.
Torque Table — Fast Summary
Component | Torque (ft-lb) | Torque (N·m) | Notes |
|---|---|---|---|
Crankshaft pulley bolt (new) | 49 ft-lb + 90° + 90° | 67 N·m + 180° | TTY — must replace |
Camshaft sprocket bolts | 68 ft-lb | 92 N·m | Use threadlocker |
Timing chain tensioner | 36 ft-lb | 49 N·m | |
Timing cover — 8mm bolts | 9 ft-lb | 12 N·m | |
Timing cover — 10mm bolts | 14 ft-lb | 19 N·m | |
Timing cover — 12mm bolts | 18 ft-lb | 24 N·m | |
Valve cover bolts | 7 ft-lb | 10 N·m | Do not overtorque |
Chain guide bolts | 9 ft-lb | 12 N·m | |
Oil pan bolts (if removed) | 9 ft-lb | 12 N·m | Use RTV on pan |
Water pump bolts | 9 ft-lb | 12 N·m | New O-ring |
Common Pitfalls
🚫 Pitfall 1: Reusing the crank pulley bolt
This is a torque-to-yield bolt. It stretches during installation. Reusing it risks snapping or backing out at speed. Always replace it. The OEM bolt costs ~$8 — don't cheap out.
🚫 Pitfall 2: Not locking the cams and crank properly
If the TDC pin isn't fully seated, or the cam plate isn't snug, you'll be a tooth off. Always rotate the engine by hand two full turns to verify before final assembly.
🚫 Pitfall 3: Overtightening the valve cover
The valve cover is aluminum — the bolts are small. 7 ft-lb is finger-tight plus a quarter turn. Use an inch-pound torque wrench (84 in-lb). Overtightening cracks the cover or strips threads.
🚫 Pitfall 4: Forgetting to prime the tensioner
If you install the tensioner without the locking pin, the plunger will extend too soon and bind. Or if you forget to compress it fully, you won't get it into the bore. Follow the instructions that come with your kit.
🚫 Pitfall 5: Skipping RTV cleanup
Old RTV in the oil passages can clog the oil pickup screen. Scrape it all off the block, the timing cover, and the oil pan before applying new sealant.
🚫 Pitfall 6: Not replacing the water pump while you're in there
The water pump is driven by the timing chain on many K-series — or at least buried behind the same cover. If you're at 100k+ miles, replace the pump now. It adds 20 minutes and $60 — much cheaper than doing the job twice.
🚫 Pitfall 7: Using generic coolant
Honda engines use specific coolant formulations (Type 2). Use it. Generic coolant can corrode the aluminum block.
Contributors
Role | Username | Notes |
|---|---|---|
Primary Author | @torquemaster | Based on 5 K-series chain replacements (K20A, K24Z, K24A) |
Technical Reviewer | @honda_tech_20yrs | Former Honda master technician, verified against 2016 Civic Si service manual |
Fact Check | @k24_swap_daily | Verified torque specs with snap-on torque wrench cal |
Safety Review | @senior_editor_01 | Safety Critical flag approved |
References & Further Reading
Honda Factory Service Manual (K-series) — Section 6, Engine Mechanical
K20/K24 Timing Chain Kit Installation Instructions (Cloyes)
Honda TSB 06-048: Oil Consumption / Tensioner Update





No comments yet — grab the first one.