Learning how to check car battery condition can save you from guessing at a no-start problem. A slow crank, clicking starter, dim interior lights, or a battery warning lamp can point to a weak battery, a charging fault, corroded connections, or a starter problem. The checks below use basic tools and take about 20 minutes. Park on a level surface, shut off the engine, set the parking brake, and remove metal jewelry before working near the terminals.
Tools, safety, and what the readings mean
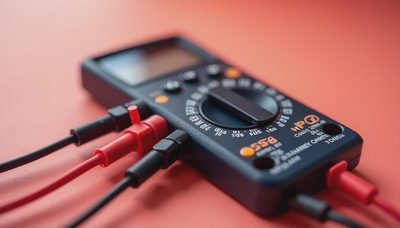
For how to check car battery voltage, you need a digital multimeter, safety glasses, gloves, and a small wire brush or terminal-cleaning tool. A 12-volt battery stores enough energy to create sparks, so never place a wrench across the positive and negative posts. Keep cigarettes, flames, and sparks away from a conventional flooded battery because it can release hydrogen gas while charging.
A fully charged battery at rest usually measures about 12.6 to 12.8 volts. Around 12.4 volts indicates roughly a partial charge, while 12.2 volts is low enough to affect diagnosis. A reading near 12.0 volts means the battery is deeply discharged. These figures are useful guidelines, not a final verdict. A battery can show acceptable voltage and still fail when a starter demands high current.
Before measuring, let the vehicle sit with the engine off for at least 30 minutes. If you just drove it, surface charge can produce an artificially high number. Turn on the headlights for about 30 seconds, switch them off, and then wait several minutes if you need to remove that surface charge.

How to check car battery condition with a visual inspection
Start with the battery case. It should not be swollen, cracked, leaking, or wet around the seams. A swollen case often indicates heat damage, overcharging, freezing, or internal failure. Do not keep testing a leaking or badly damaged battery; arrange for safe replacement and recycling.
Next, examine the positive and negative terminals. White, blue, or green crust can increase resistance between the battery and the vehicle. Look for loose clamps, broken cables, rubbed insulation, and a missing hold-down bracket. The battery must not slide around in its tray. Movement can damage the case and terminals, especially on rough roads.
If corrosion is light, disconnect the negative cable first, followed by the positive cable. Clean the posts and clamps with a terminal brush. Reconnect the positive cable first and the negative cable second, then tighten each clamp until it cannot rotate by hand. Do not hammer a clamp onto a post or overtighten it. On many vehicles, the battery is part of a battery-management system, so replacement can also require registration or a reset procedure.
How to check car battery voltage with a multimeter
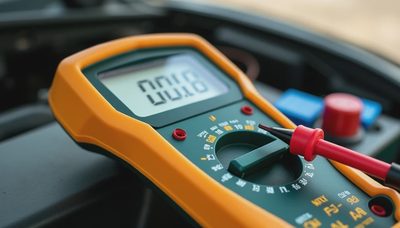
Set the meter to DC volts, using the 20-volt range if it is not autoranging. Touch the red probe to the positive terminal and the black probe to the negative terminal. Probe the actual lead posts first, not a painted bracket or a heavily corroded clamp. Record the number before starting the engine.
A healthy, fully charged result should be close to 12.6 volts. If you see 12.2 volts or less, charge the battery with a suitable automotive charger and repeat the test after it rests. Do not condemn the battery solely because it was discharged; a door left open or a vehicle that sat for several weeks can produce the same reading.
Now watch the meter while an assistant starts the engine. The voltage will drop during cranking, but a serviceable battery commonly stays above about 9.6 volts at room temperature. A lower result suggests low charge, high internal resistance, poor cable connections, or a starter drawing excessive current. Cold temperatures can lower cranking voltage, so record the temperature and test conditions.
After the engine starts, measure again at the battery posts. Most conventional charging systems produce approximately 13.7 to 14.7 volts with the engine running, although the exact behavior depends on the vehicle and its smart-charging strategy. A low running reading can indicate an alternator, belt, wiring, or control problem. An unusually high reading can point to a regulator fault that can damage the battery and electronics.
Load testing and distinguishing the real fault
A handheld battery load tester gives a more demanding answer than a resting-voltage check. Fully charge the battery first, enter its cold-cranking amp rating from the label, and follow the tester instructions. Many traditional tests apply a load equal to about half the rated cold-cranking amps for 15 seconds. A strong battery should remain near the tester's specified minimum, often around 9.6 volts at 70 degrees Fahrenheit.
Modern vehicles with AGM batteries require an AGM-compatible tester and the correct setting. Do not use an old carbon-pile procedure blindly on a battery with a different design. If the test fails after a full charge, replacement is usually justified. If it passes but the car still cranks slowly, inspect the cables and perform a voltage-drop test.
For that test, place one meter lead on the battery positive post and the other on the starter's main positive terminal while cranking. More than about 0.5 volts on the positive side suggests cable or connection resistance. Repeat between the battery negative post and the starter or engine block; more than about 0.2 to 0.3 volts on the ground side deserves investigation. Exact limits vary by vehicle, but a large voltage drop identifies the path rather than blaming the battery automatically.

Common mistakes when testing a battery
One frequent mistake is measuring immediately after driving and accepting a surface-charge reading as proof of battery health. Another is testing only the battery posts while ignoring a loose clamp. A third is replacing a battery without checking charging voltage; a failing alternator can flatten a new battery in days.
Do not run a load test on a frozen battery. A deeply discharged battery can freeze in cold weather, and charging or loading it may damage the case. Also avoid using the continuity or resistance setting across a live battery. That can damage the meter and create a dangerous short circuit.
If the battery repeatedly loses charge overnight, the problem may be a parasitic draw rather than battery age. After the vehicle enters sleep mode, a professional-grade current test can identify excessive drain from an aftermarket alarm, dash camera, glove-box lamp, or control module. Pulling fuses at random can wake modules and produce misleading readings, so document each step.
When replacement makes sense
Battery life depends on climate, vibration, charging performance, and driving pattern. Short trips that never restore the energy used during starting are hard on a battery. If the case is damaged, the load test fails, the terminals will not stay tight, or the battery repeatedly needs charging, replacement is more sensible than repeated jump-starts.
Match the replacement's group size, terminal layout, minimum cold-cranking amps, and battery type. A vehicle designed for AGM should receive an AGM battery, not a cheaper conventional unit. After installation, clean the tray, secure the hold-down, and verify that the cables cannot contact moving or hot components. Some late-model vehicles need battery registration with a scan tool so the charging system knows the battery's age and capacity.
The practical answer to how to check car battery health is to combine four observations: physical condition, resting voltage, cranking voltage, and charging voltage. When those results agree, the diagnosis is usually clear. If they conflict, test the cables, starter, alternator, and parasitic draw before buying parts. That method costs less than guessing and leaves a useful record for the next repair.



No comments yet — grab the first one.